

In January, I wrote a post about styling coffee tables, today I want to explore the use of a tray, a simple tool stylists often use to create table top vignettes. Styling a vignette does not take a mathematical genius with a degree in design, following these five simple steps will help you on your way.
1. TRAYS:
This will first of all create a flat surface to become the foundation for your display. Your tray can be large or small depending on your space and what you want to display. It may be rustic, vintage silver, in fact almost any material you may choose. A tray is also very convenient if you need to move things in a hurry to create more space such as on a coffee table or kitchen island.
2. THINK ABOUT THE THEME:
Think about the room you are placing your tray in, is it a bathroom, bedroom, living area etc, what you use in your display should reflect the use of the room in some form or other. The images below will help illustrate this meaning.
3. FLOWERS/PLANT:
Add some life with a vase of flowers or plant. Think about what surrounds you and your personal decorative style. For example, if you have a country themed interior you may want to add a vase of peonies or roses, even a mixed bunch of flowers from your garden. If your style is Asian, then a simple Bonsai tree or some twisted willow in a tall oriental vase may be your choice. For a dining area with a rustic look, you could use a small topiary in a weathered pot.
4. YOUR KEY PIECE:
Once you have your fresh flowers then select a key piece to display, something that catches your eye and works with your theme. You can then select your remaining items, (odd numbers work best).
5. LAYERING
The next important point to remember is layering, which I have spoken about in more detail in 'Creating The Perfect Console Vignette'. The same points I discussed in this previous post also apply when styling a tray. Work from back to front, layering your items. Think about colour, texture and pattern. They don't always have to compliment each other, often a contrasting statement piece will look great. Remember not to clutter the tray, just a few key pieces - Also think varying heights.
Yesterday I had some girlfriends over for lunch, it was a wonderful day filled conversation and laughter. It was just a friendly lunch but my girlfriends most generously showered me with unexpected flowers. I have used the flowers, along with a few other pieces for a simple tray display for my kitchen island.
I chose a wooden tray previously repainted using chalk paint. The tray has a worn, Mediterranean appeal. I wanted to have a slightly rustic theme going on, my key piece was my French, milk glass chicken, once belonging to my grandmother. I then chose to place my hyacinths in a rattan basket for a rustic look. My final piece was a little iron bird that usually sits on my garden table. I mixed textures, such as glass, iron and rattan and moved the items around until I was happy my simple vignette. I also couldn't resist displaying the other beautiful green and white flowers I received, so I placed these off the tray, directly on the bench.


Below..I removed the flowers for a less cluttered look...
More inspiration from Pinterest...

1. Above: A simple bathroom display, you could also add some neatly rolled up hand towels in a small rattan basket
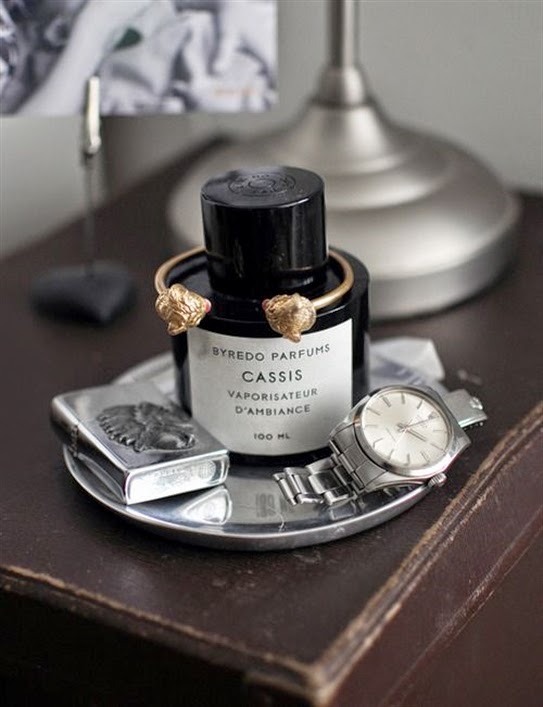
2. Above: A tiny tray, so no room for flowers, the touch of gold adds contrast and compliments the vintage leather beneath. You could place a small vase of flowers behind this display

3. Above: I love this tray, the black/grey and white snake pattern on the tray creates an interesting, textured look. The little glass dish is a great way to keep all those miniature perfumes in place. The coral adds the 'life' the display required

4. Above: Keep your perfumes tidy - A sweet display of perfumes in varying sizes on a vintage silver tray. The silver tray works perfectly with the reflective mirror surface of the table top. The other items around the tray complete the vignette, the tray is just a part of this very feminine bedroom display

5.Above: A summery appeal

6. Above: Using a butlers tray as a side table is a popular choice - Image from 'The Daily Dose' where I found more tips on tray styling

7. Above: A mix of textures, leather, silver and ceramic. The orange, leather box reflects this rooms accent colour

8. Above: A tray is perfect for an office and makes it easy to move to clean your desk surface

9. Above: A minimalist display reflecting the ocean colours and textures - Agate, coral and wood

10. Above: Trays are a great way to display drink accompaniment's

11. Clever layering on this pretty drinks tray
I hope this post has been helpful inspiring you to create a few 'tray' displays in your home. I plan to create a small one for my desk and one for my bathroom.
With regards to my office update, I have all the furniture in place now apart from one piece. I am sorry I haven't posted an update recently, I promise... promise, I will post a few more images next week, however I want to wait until I have everything in place for the final 'before and after' reveal.
For more ideas on styling, please visit my Pinterest 'styling' board.

Linking with the following blog parties:
No comments:
Post a Comment
Thank you for your time to leave a comment, I ♥ to read your comments and try to reply to them all.